Monday, May 30, 2011

PhysX3: Simple distance joint

In this tutorial, we will see how to create a simple distance joint. We will reuse the picking code in this tutorial to make things a bit more interesting. So without any further ado, lets get started. We will create two boxes one of which will be a static object. The other box will be manipulated by the mouse hence it will be dynamic.
Creating the boxes
The dynamic box

//2) Create dynamic cube  
PxReal density = 1.0f;
PxTransform transform(PxVec3(0.0f, 3.0, 0.0f), PxQuat::createIdentity());
PxVec3 dimensions(0.5,0.5,0.5);
PxBoxGeometry geometry(dimensions);    
PxRigidDynamic *dyn_box = PxCreateDynamic(*gPhysicsSDK, transform, geometry, *mMaterial, density);
if (!dyn_box)
   cerr<<"create actor failed!"<<endl;
dyn_box->setAngularDamping(0.75);
dyn_box->setLinearVelocity(PxVec3(0,0,0)); 
gScene->addActor(*dyn_box);
boxes.push_back(dyn_box);

The above lines are what we have seen in all the tutorials.
The static box
For static box, we simply create a PxRigidStatic object reusing the same geometry.
//create static cube
transform.p=PxVec3(0,5,0);
PxRigidStatic *static_box = PxCreateStatic(*gPhysicsSDK, transform, geometry, *mMaterial);
if (!static_box)
   cerr<<"create actor failed!"<<endl;
gScene->addActor(*static_box);
boxes.push_back(static_box);


Creating joint
For creating a very basic distance joint, we need to use the PxDistanceJointCreate function. This function takes the PhysX sdk object, the first rigidbody, the local transform of it, the second rigid body and its local transform. Next, the parameters are set for the distance joint as we did for the previous PhysX version.
//create a joint  
PxDistanceJoint* j = PxDistanceJointCreate(*gPhysicsSDK, dyn_box, PxTransform::createIdentity(), static_box, PxTransform::createIdentity());
j->setDamping(1);
j->setSpring(200);
j->setMinDistance(1);
j->setMaxDistance(2);
j->setConstraintFlag(PxConstraintFlag::eCOLLISION_ENABLED, true);
j->setDistanceJointFlag(PxDistanceJointFlag::eMIN_DISTANCE_ENABLED, true);
j->setDistanceJointFlag(PxDistanceJointFlag::eMAX_DISTANCE_ENABLED, true);
j->setDistanceJointFlag(PxDistanceJointFlag::eSPRING_ENABLED, true);


Rendering of the distance joint
For rendering of the distance joint, we do a fairly simple thing by creating a global array for 2 PxVec3 types. When we are about to draw the box actors, we store their current positions in the global array so the new DrawCube function is this,
//Stored globally
PxVec3 pos[2]; //for storing the two end points of spring
void DrawBox(PxShape* pShape) {
static int count=0;
 
PxTransform pT = PxShapeExt::getGlobalPose(*pShape);
pos[(count++)%2] = pT.p;
PxBoxGeometry bg;
pShape->getBoxGeometry(bg);
PxMat33 m = PxMat33Legacy(pT.q );
float mat[16];
getColumnMajor(m,pT.p, mat);
glPushMatrix(); 
glMultMatrixf(mat);
glutSolidCube(bg.halfExtents.x*2);
glPopMatrix(); 
}
 

Next, in the render function, we draw the line between the two positions just stored.
glColor3f(gMouseJoint!=NULL,gMouseJoint==NULL,gMouseJoint==NULL);
//Draw the spring 
glBegin(GL_LINES);
   glVertex3f(pos[0].x, pos[0].y, pos[0].z);
   glVertex3f(pos[1].x, pos[1].y, pos[1].z);
glEnd();


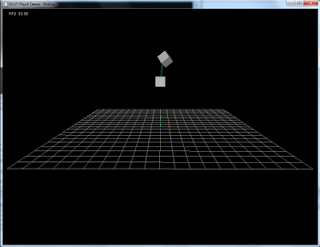
That's it we have a simple distance joint between two boxes. Here is the snapshot from this application.


Source code of this tutorial

Sunday, May 29, 2011

PhysX3: Picking

In this tutorial, we will use the scene of multiple boxes from a previous tutorial. This tutorial assumes that you have successfully understood the basics of how to create an actor using the scene object. If not, u may want to review the previous tutorials as a refresher. Ok so now lets get started. There are a lot of things similar between this and the previous tutorial.

Picking in PhysX3
We have our matrices setup as in the picking tutorial for the previous PhysX version. We now come on the Pick function. This function takes an x, y screen coordinate, cast a ray into the scene and returns true if there is an intersection. It also stores a sphere object at the hit point, stores reference to the intersected actor and also stores a spring between the hitpoint sphere and the actor. We store the used joint and mouse sphere object pointers globally.
PxDistanceJoint *gMouseJoint = NULL;
PxRigidDynamic* gMouseSphere = NULL;
PxReal gMouseDepth = 0.0f;
PxRigidDynamic* gSelectedActor=NULL;


The pick actor function is defined as follows,

bool PickActor(int x, int y)
{
 LetGoActor();

We first release all previous helpers (the spring and the last intersection sphere.

Ray ray;
ViewUnProject(x,y,0.0f, ray.orig);
ViewUnProject(x,y,1.0f, ray.dir);
ray.dir -= ray.orig; ray.dir.normalize();

The above lines create a ray as given in the previous paragraph. In PhysX3 there is no Ray object so we define our own struct for Ray.

PxRaycastHit hit;
PxShape* closestShape;
gScene->raycastSingle(ray.orig, ray.dir, length, PxSceneQueryFlag::eIMPACT  ,hit);
closestShape = hit.shape;
if (!closestShape) return false;
if (!closestShape->getActor().is(PxActorType::eRIGID_DYNAMIC)) return false;

The above lines are where the ray is cast to find the closest actor. If there is none, we return false.

int hitx, hity;
ViewProject(hit.impact, hitx, hity, gMouseDepth);
gMouseSphere = CreateSphere(hit.impact, 0.1f, 1.0f);
gMouseSphere->setRigidDynamicFlag(PxRigidDynamicFlag::eKINEMATIC, true);  

The above lines project the hit point back to get the world space position. This is done so that the picking cursor (sphere) could be drawn at the intersection point.
The sphere's body flag is raised to kinematic since it will be attached to an actor through a distance joint (see next few lines).

gSelectedActor = (PxRigidDynamic*) &closestShape->getActor();
gSelectedActor->wakeUp();
PxTransform mFrame, sFrame;
mFrame.q = gMouseSphere->getGlobalPose().q;
mFrame.p = gMouseSphere->getGlobalPose().transformInv(hit.impact );
sFrame.q = gSelectedActor->getGlobalPose().q;
sFrame.p = gSelectedActor->getGlobalPose().transformInv(hit.impact );
gMouseJoint = PxDistanceJointCreate(*gPhysicsSDK, gMouseSphere, mFrame, gSelectedActor, sFrame);
gMouseJoint->setDamping(1);
gMouseJoint->setSpring(200);
gMouseJoint->setMinDistance(0);
gMouseJoint->setMaxDistance(0);
gMouseJoint->setDistanceJointFlag(PxDistanceJointFlag::eMAX_DISTANCE_ENABLED, true);
gMouseJoint->setDistanceJointFlag(PxDistanceJointFlag::eSPRING_ENABLED, true);
return true;
}

These lines create a distance joint between the mouse sphere and the picked object; having one end point, our sphere cursor and the other end point our intersected actor.
The object's global pose is used to transform the hit point from world space to object's local space so that the joint could be oriented properly.
Finally, the joint parameters are filled in and a joint is created. Note that on every mouse click, the old cursor (sphere) and joint are released and a new pair is created. The LetGoActorfunction is defined as follows,
void LetGoActor()
{
if (gMouseJoint)
  gMouseJoint->release();
  gMouseJoint = NULL;
if (gMouseSphere)
  gMouseSphere->release();
  gMouseSphere = NULL;
}

Nothing fancy here either. We just release the created objects (the sphere cursor and the joint).

That's it. You need to call the pick function in the mouse function and handle the drag event. Enjoy this snapshot from the demo.

Picking in PhysX3.1

Source code of this tutorial

Saturday, May 28, 2011

PhysX3: Using the visual debugger

How to enable remote debugging in your application
On the client side (your application) after you have created the sdk object call this line of code.

PxExtensionVisualDebugger::connect(gPhysicsSDK->getPvdConnectionManager(),"localhost",5425, 10000, true);

The parameters are in sequential order the PVD connection manager, the ip of the debugger, the port where the connection will be made, the timeout after which the connection will be dropped. For details about these parameters, consult the help docs of the visual debugger.

Demo run
We will now try to see the debugger in action. First, run the visual debugger. Then run your application. You should see all of your objects in the visual debugger. The active objects are green and the inactive (sleep) objects are yellow. This can turn out to be an invaluable tool when we are working on a fairly large project.

That's it for this demo. There is no source code for this tutorial. Just use any of the existing codes and add in the code snippet given earlier and see it in action.
Here is a snapshot of a debugging session.

Using PhysX3.1 Visual Debugger

We will look at how to create joints in the next tutorial.

PhysX3: Multiple bouncing boxes

In this tutorial, we will add multiple boxes to the scene. This tutorial assumes that you have successfully understood the basics of how to create an actor using the scene object. If not, u may want to review the previous tutorials as a refresher. Ok so now lets get started. There are a lot of things similar between this and the previous tutorial on the simple box. In fact, the only thing changed when we need to add multiple boxes is the InitializePhysX function. In addition, we need to store the references to the boxes into a vector so we create a new vector.
#include <vector>
vector <PxRigidActor*> boxes;


This InitializePhysX function is given as follows,

void InitializePhysX() {
 gPhysicsSDK = PxCreatePhysics(PX_PHYSICS_VERSION, gDefaultAllocatorCallback, gDefaultErrorCallback, PxTolerancesScale() );
if(gPhysicsSDK == NULL) {
  cerr<<"Error creating PhysX device."<<endl;
  cerr<<"Exiting..."<<endl;
  exit(1);
 }
 if(!PxInitExtensions(*gPhysicsSDK))
    cerr<< "PxInitExtensions failed!"<<endl;

 
 //Create the scene
 PxSceneDesc sceneDesc(gPhysicsSDK-> getTolerancesScale());
 sceneDesc.gravity=PxVec3(0.0f, -9.8f, 0.0f);
 if(!sceneDesc.cpuDispatcher) {
   PxDefaultCpuDispatcher* mCpuDispatcher = PxDefaultCpuDispatcherCreate(1);
   if(!mCpuDispatcher)
      cerr<<"PxDefaultCpuDispatcherCreate failed!"<<endl;
      sceneDesc.cpuDispatcher = mCpuDispatcher;
   } 
   if(!sceneDesc.filterShader)
      sceneDesc.filterShader  = gDefaultFilterShader;

   gScene = gPhysicsSDK->createScene(sceneDesc);
   if (!gScene)
       cerr<<"createScene failed!"<<endl;
 gScene->setVisualizationParameter(PxVisualizationParameter::eSCALE,     1.0);
 gScene->setVisualizationParameter(PxVisualizationParameter::eCOLLISION_SHAPES, 1.0f);
PxMaterial* mMaterial = gPhysicsSDK->createMaterial(0.5,0.5,0.5);
  
//Create actors 
//1) Create ground plane
PxReal d = 0.0f;  
PxTransform pose = PxTransform(PxVec3(0.0f, 0, 0.0f),PxQuat(PxHalfPi, PxVec3(0.0f, 0.0f, 1.0f)));
PxRigidStatic* plane = gPhysicsSDK->createRigidStatic(pose);
if (!plane)
   cerr<<"create plane failed!"<<endl;

PxShape* shape = plane->createShape(PxPlaneGeometry(), *mMaterial);
if (!shape)
   cerr<<"create shape failed!"<<endl;
gScene->addActor(*plane); 

We are repeating the same steps as we did in the last tutorial. We first initialize the PhysX library and its extensions. Next we create the scene object and then we create a static ground plane rigidbody.

//2) Create cube  
PxReal density = 1.0f;
PxTransform transform(PxVec3(0.0f, 5.0, 0.0f), PxQuat::createIdentity());
PxVec3 dimensions(0.5,0.5,0.5);
PxBoxGeometry geometry(dimensions);    
for(int i=0;i<10;i++) {
 transform.p  = PxVec3(0.0f,5.0f+5*i,0.0f);
PxRigidDynamic *actor = PxCreateDynamic(*gPhysicsSDK, transform, geometry, *mMaterial, density);
 if (!actor)
   cerr<<"create actor failed!"<<endl;
 actor->setAngularDamping(0.75);
 actor->setLinearVelocity(PxVec3(0,0,0)); 
 gScene->addActor(*actor);
 boxes.push_back(actor);
}
}

In the above lines, we loop 10 times. We generate a new y position using the loop variable and then assign this position to the global pose of the current actor. In the previous PhysX release, we would create a new actor and give it the same descriptor. Now we have to create a new actor with new transform. Next we call the addActor function to create a new object for us.

Rendering of multiple boxes
In PhysX3, the rendering of objects has greatly been simplified. Since at the time of creation of our rigid bodies, we stored them into a vector. We use that vector for rendering. The RenderActors function and the other related functions are implemented as follows,
void RenderActors()  { 
  // Render all the actors in the scene 
  for(int i=0;i<boxes.size();i++ ) {
    DrawActor(boxes[i]);
  }
} 
void DrawBox(PxShape* pShape) {
  PxTransform pT = PxShapeExt::getGlobalPose(*pShape);
  PxBoxGeometry bg;
  pShape->getBoxGeometry(bg);
  PxMat33 m = PxMat33Legacy(pT.q );
  float mat[16];
  getColumnMajor(m,pT.p, mat);
  glPushMatrix(); 
     glMultMatrixf(mat);
  glutSolidCube(bg.halfExtents.x*2);
  glPopMatrix(); 
}
void DrawShape(PxShape* shape)  { 
  PxGeometryType::Enum type = shape->getGeometryType();
  switch(type) 
  {          
     case PxGeometryType::eBOX:
 DrawBox(shape);
 break;
  } 
} 

void DrawActor(PxRigidActor* actor)  {  
  PxU32 nShapes = actor->getNbShapes(); 
  PxShape** shapes=new PxShape*[nShapes];
  actor->getShapes(shapes, nShapes);     
  while (nShapes--) 
  { 
     DrawShape(shapes[nShapes]); 
  } 
  delete [] shapes;
} 

The only difference between this RenderActor function and the one in the previous
tutorial is that this function loops over all of the rigid bodies. That's it. The rest of the code remains the same since it will loop through all of the actors and determine their types to call the appropriate draw function as detailed in the last tutorial.

Running the code gives us the following output.
PhysX3.1 Multiple Boxes

Source code of this tutorial

Friday, May 27, 2011

PhysX3: A simple bouncing box

In this tutorial, I will show you how to create a simple box at a specific position and let it bounce under influence of gravity. We will be adding to the code base from the previous tutorials. We first create the PhysX3 sdk object and store it into a global pointer as given in the previous tutorial. For this tutorial, the following headers and libs are needed.

#include <iostream>
#include <GL/freeglut.h>
#include < PxPhysicsAPI.h>
#include < PxExtensionsAPI.h>
#include < PxDefaultErrorCallback.h>
#include < PxDefaultAllocator.h>
#include < PxDefaultSimulationFilterShader.h>
#include < PxDefaultCpuDispatcher.h>
#include < PxShapeExt.h>
#include < PxMat33Legacy.h>
#include < PxSimpleFactory.h>

using namespace std;

#pragma comment(lib, "PhysX3_x86.lib")
#pragma comment(lib, "PxTask.lib")
#pragma comment(lib, "Foundation.lib")
#pragma comment(lib, "PhysX3Extensions.lib")
#pragma comment(lib, "GeomUtils.lib")

As you can see, now we have to add a lot of headers this is because a lot of parameters which were given by default in the previous PhysX versions have to be given explicitly.


const int WINDOW_WIDTH=1024,
WINDOW_HEIGHT=768;

static PxPhysics* gPhysicsSDK = NULL;
static PxDefaultErrorCallback gDefaultErrorCallback;
static PxDefaultAllocator gDefaultAllocatorCallback;
static PxSimulationFilterShader gDefaultFilterShader=PxDefaultSimulationFilterShader;

PxScene* gScene = NULL;
PxReal myTimestep = 1.0f/60.0f;
PxRigidActor *box;

In the above lines, we store the variables for screen size, the global physx sdk pointer, scene pointer and the box rigid body pointer. In PhysX3, we no more need to provide the shape desc for objects since now only the geometry has to be specified using the available classes as we will see in a minute.


gPhysicsSDK = PxCreatePhysics(PX_PHYSICS_VERSION, gDefaultAllocatorCallback, gDefaultErrorCallback, PxTolerancesScale() );
if(gPhysicsSDK == NULL) {
cerr<<"Error creating PhysX3 device."<<endl;
cerr<<"Exiting..."<<endl;
exit(1);
}

if(!PxInitExtensions(*gPhysicsSDK))
cerr<< "PxInitExtensions failed!" <<endl;


In the above lines, we call the CreatePhysX function.Now in PhysX3, we need to provide the allocator and the error callback. We pass in the default handlers provided by the PhysX3 sdk. Once we have a valid PhysX object, we initialize the extensions. This is required so that the other extensions are setup properly.


//Create the scene
PxSceneDesc sceneDesc(gPhysicsSDK->getTolerancesScale());
sceneDesc.gravity=PxVec3(0.0f, -9.8f, 0.0f);
if(!sceneDesc.cpuDispatcher) {
PxDefaultCpuDispatcher* mCpuDispatcher = PxDefaultCpuDispatcherCreate(1);
if(!mCpuDispatcher)
cerr<<"PxDefaultCpuDispatcherCreate failed!"<<endl;
sceneDesc.cpuDispatcher = mCpuDispatcher;
}
if(!sceneDesc.filterShader)
sceneDesc.filterShader = gDefaultFilterShader;

gScene = gPhysicsSDK->createScene(sceneDesc);
if (!gScene)
cerr<<"createScene failed!"<<endl;
gScene->setVisualizationParameter(PxVisualizationParameter::eSCALE, 1.0);
gScene->setVisualizationParameter(PxVisualizationParameter::eCOLLISION_SHAPES, 1.0f);

In the above lines, the scene object is created and the parameters for the simulation are passed in as was in the previous physX versions. In this case, we ask PhysX to set up the global scene gravity to 9.8 m/s^2 The -ve sign is to make it point downwards.


PxMaterial* mMaterial = gPhysicsSDK->createMaterial(0.5,0.5,0.5);


In the above lines, we set the default material's physical properties like static and dynamic friction and the coefficient of restitution. In PhysX3, the default materials are not accessed by index now we need to give an a new object.
Creating actors

//Create actors
//1) Create ground plane
PxReal d = 0.0f;
PxTransform pose = PxTransform(PxVec3(0.0f, 0, 0.0f),PxQuat(PxHalfPi, PxVec3(0.0f, 0.0f, 1.0f)));
PxRigidStatic* plane = gPhysicsSDK->createRigidStatic(pose);
if (!plane)
cerr<<"create plane failed!"<<endl;
PxShape* shape = plane->createShape(PxPlaneGeometry(), *mMaterial);
if (!shape)
cerr<<"create shape failed!"<<endl;
gScene->addActor(*plane);

//2) Create cube
PxReal density = 1.0f;
PxTransform transform(PxVec3(0.0f, 10.0f, 0.0f), PxQuat::createIdentity());
PxVec3 dimensions(0.5,0.5,0.5);
PxBoxGeometry geometry(dimensions);

PxRigidDynamic *actor = PxCreateDynamic(*gPhysicsSDK, transform, geometry, *mMaterial, density);
actor->setAngularDamping(0.75);
actor->setLinearVelocity(PxVec3(0,0,0));
if (!actor)
cerr<<"create actor failed!"<<endl;
gScene->addActor(*actor);

box = actor;
}

In the above lines, we create two actors for the ground plane and the box. For each of these actors, we first set their transform. In PhysX3 the transforms are now given as quaternions. We then create the PxRigid[Static/Dynamic] object by calling appropriate function to create a static/dynamic object. Next, the shape of the object is specified and then the actor is added to the scene. For box, the box geometry is specified here. We use this geometry object by storing the actor reference into a global variable.

Handling PhysX stepping loop
Once the actor stuff is done, the next thing we need to handle is the PhysX loop. This will allow the simulation to step ahead in time. We will implement an asynchronous loop which can be done using the following lines of code.

void StepPhysX()
{
gScene->simulate(myTimestep);

//...perform useful work here using previous frame's state data
while(!gScene->fetchResults() )
{
// do something useful
}
}

These lines were copied directly from the documentation so rather than commenting anything on these, I would ask you to go and read the asynchronous loop section in the PhysX documentation. We will call this function once from our display function.

Rendering of Actors
The next step is to render the actors. To make easier for use to work with PhysX, I have modularized the code into functions. First, the RenderActors() function is implemented as follows,

void RenderActors()
{
// Render all the actors in the scene
DrawActor(box);
}

Nothing fancy here, we just call the DrawActor function passing it the box actor reference. The DrawActor function is implemented as follows,

 
void DrawActor(PxRigidActor* actor)
{
PxU32 nShapes = actor->getNbShapes();
PxShape** shapes=new PxShape*[nShapes];

actor->getShapes(shapes, nShapes);
while (nShapes--)
{
DrawShape(shapes[nShapes]);
}
delete [] shapes;
}

It looks a lot like the previous PhysX version DrawActor function. It basically ask the actor for the number of shapes it has and then calls the DrawShapes function with the shape parameter. The DrawShape function is implemented as follows,


void DrawShape(PxShape* shape)
{
PxGeometryType::Enum type = shape->getGeometryType();
switch(type)
{
case PxGeometryType::eBOX:
DrawBox(shape);
break;
}
}

This function first identifies the type of the shape and then uses a switch case to call the appropriate Draw function. For our case, we check for the Box object and then call the DrawBox function passing it the shape parameter. The DrawBox function is implemented as follows,


void DrawBox(PxShape* pShape) {
PxTransform pT = PxShapeExt::getGlobalPose(*pShape);
PxBoxGeometry bg;
pShape->getBoxGeometry(bg);
PxMat33 m = PxMat33Legacy(pT.q );
float mat[16];
getColumnMajor(m,pT.p, mat);
glPushMatrix();
glMultMatrixf(mat);
glutSolidCube(bg.halfExtents.x*2);
glPopMatrix();
}

The DrawBox function gets the current Global pose (basically the shapes tranform matrix) and then converts it into a column major form (so that we can pass this matrix to OpenGL). Next, the currnet transformation matrix is stored (glPushMatrix) and then the box's matrix is multiplied to the current matrix. Then, we draw the box's geometry (using the glutSolidCube function) and finally revert the old transformation back by calling glPopMatrix.

The Display Function
Now after these function definitions, the display function becomes this,

void Display() {
glClear(GL_COLOR_BUFFER_BIT|GL_DEPTH_BUFFER_BIT);
glLoadIdentity();
//setup the view transformation using
//gluLookAt(...);

//Update PhysX
if (gScene)
{
StepPhysX();
}

RenderActors();

glutSwapBuffers();
}


That's it. Attached is the complete source code for this tutorial. Here is the snapshot of the application.
PhysX3.1 Simple Box

Source code for this tutorial

PhysX3: Getting started

There has been a major revamp of the PhysX API from version 3. I will try to convert all of the existing tutorials into PhysX3 so here I go with the first getting started tutorial.
Visual studio2008 project include directories
To ensure that you can follow smoothly along with me in the rest of the tutorials, make sure that the visual studio project directories contain the following directories in the include path. (This option is accessible through Tools->Options->Projects & Solutions->VC++ Directories. Here YOUR_PHYSX_PATH is where the PhysX3 folder is stored on your harddisk.)
YOUR_PHYSX_PATH\SDKs\PhysXAPI
YOUR_PHYSX_PATH\SDKs\PhysXAPI\foundation
YOUR_PHYSX_PATH\SDKs\PhysXAPI\extensions
YOUR_PHYSX_PATH\SDKs\PhysXAPI\common
YOUR_PHYSX_PATH\SDKs\PhysXAPI\pxtask\include
YOUR_PHYSX_PATH\Samples\SampleFramework\framework\include

Lib path
This path is added in the lib paths.
YOUR_PHYSX_PATH\SDKs\lib\win32

Getting started with NVIDIA PhysX3
We need to include the headers first.

#include <iostream>
#include <gl/freeglut.h>
#include <pxphysicsapi.h>
#include <pxdefaulterrorcallback.h>
#include <pxdefaultallocator.h>

using namespace std;

#pragma comment(lib, "PhysX3_x86.lib")
#pragma comment(lib, "Foundation")
#pragma comment(lib, "PhysX3Extensions.lib")


The PhysX header is now PxPhysicsAPI.h. This header is needed for PhysX. The rest are for c++ output/input stuff and freeglut API stuff. I like to programmatically add the linker libraries. For this basic startup demo, we need PhysX3_x86.lib/dll, Foundation.lib/dll, PhysX3Extensions.lib/dll so we link to them.

const int WINDOW_WIDTH=1024,
WINDOW_HEIGHT=768;

static PxPhysics* gPhysicsSDK = NULL;
static PxDefaultErrorCallback gDefaultErrorCallback;
static PxDefaultAllocator gDefaultAllocatorCallback;

IN the above lines, we setup the window dimensions. Then we store the PhysX object pointer. In the previous sdk, only first parameter was needed now all of the parameters are needed. These include the allocator and error callback handlers. The sdk provides default handlers so we use them.


void InitializePhysX() {
gPhysicsSDK = PxCreatePhysics(PX_PHYSICS_VERSION, gDefaultAllocatorCallback, gDefaultErrorCallback, PxTolerancesScale() );
if(gPhysicsSDK == NULL) {
cerr<<"Error creating PhysX device."<<endl;
cerr<<"Exiting..."<<endl;
exit(1);
}
}
void ShutdownPhysX() {
gPhysicsSDK->release();
}

Like before, we call the PxCreatePhysics function and pass it all the parameters. If the call succeeds, we get the object otherwise we prompt an error and exit. For release, we need to call the release function of the sdk object reference.

Thats it. The code should not give u any errors. To make sure everything is fine and there are no problems, copy PhysX3_x86.dll to the current solution directory. Hope you will enjoy the rest of the tutorials.
Source code

Popular Posts

Copyright (C) 2011 - Movania Muhammad Mobeen. Awesome Inc. theme. Powered by Blogger.